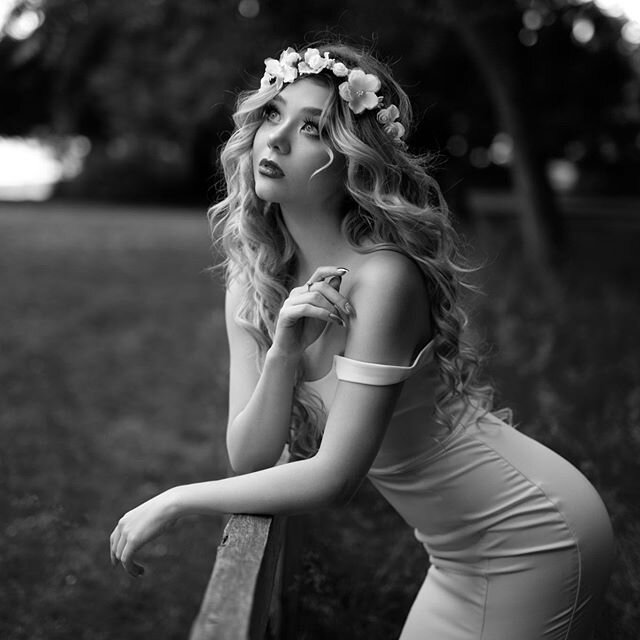
Portrait photoshoot: Fantasy portrait with Karie
Fantasy portrait is my favourite.
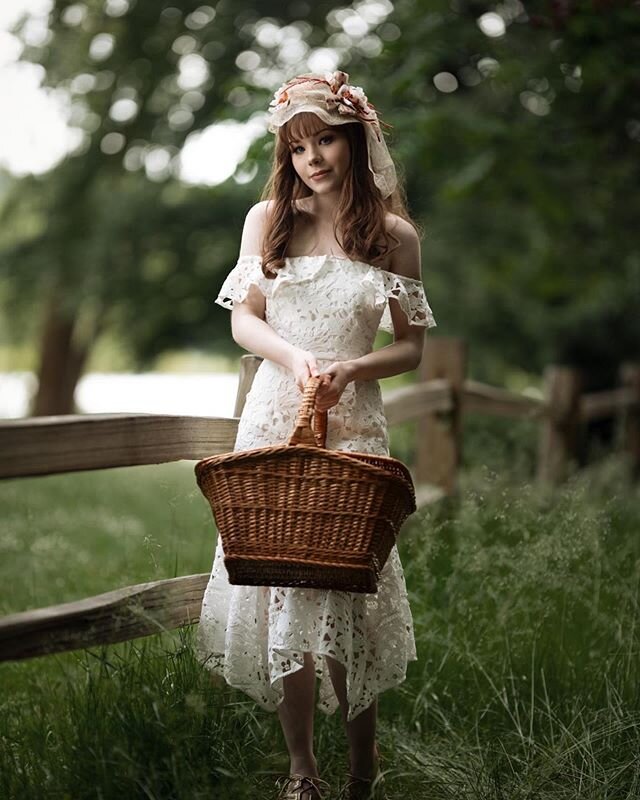
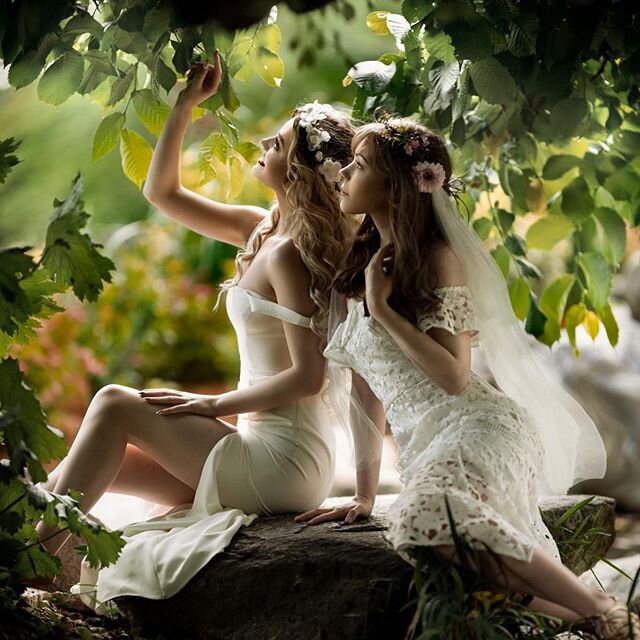
I used to work with a very talented designer on a few fantasy themed photo shoots but she’s been retired for a few years. It’s not easy to find the right wardrobe and prop that’s why I haven’t been able to shoot something like this for a very long time, till I found Karie.
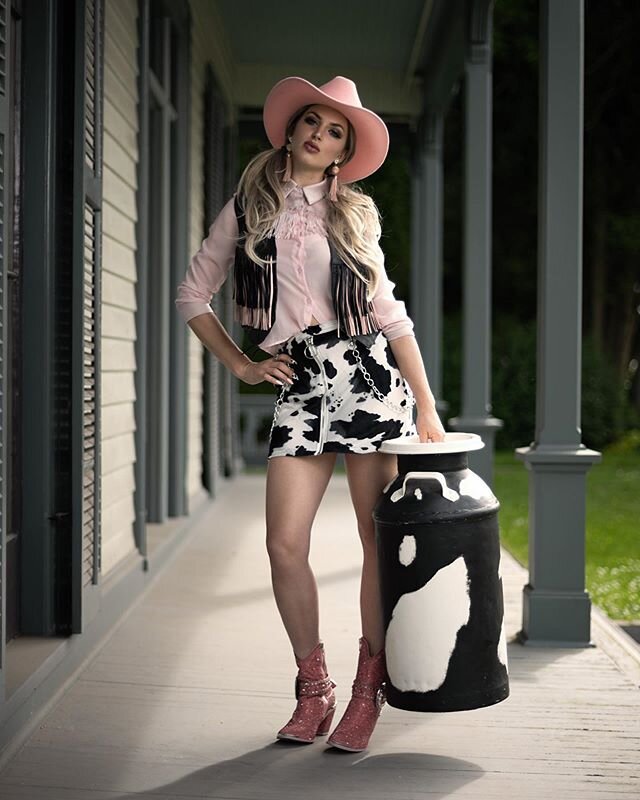
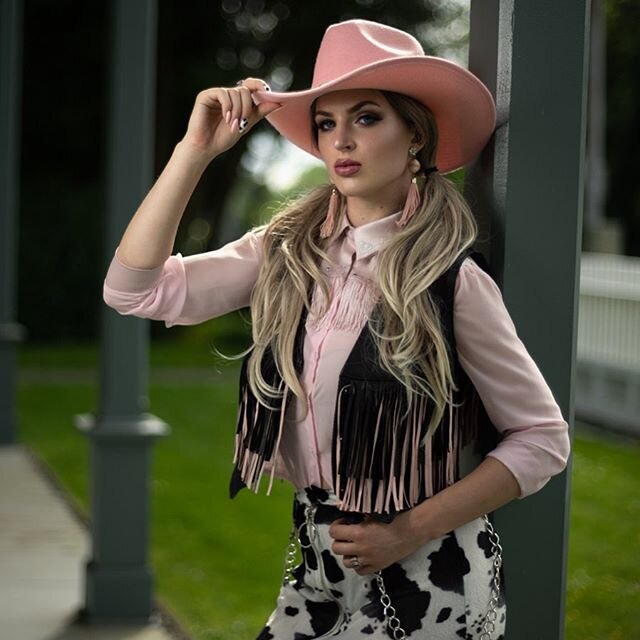
Karie is a great model. I worked with her a few times but I never know she also has a huge collection of fantasy stuff. So we did this photo shoot and I absolutely love the result.
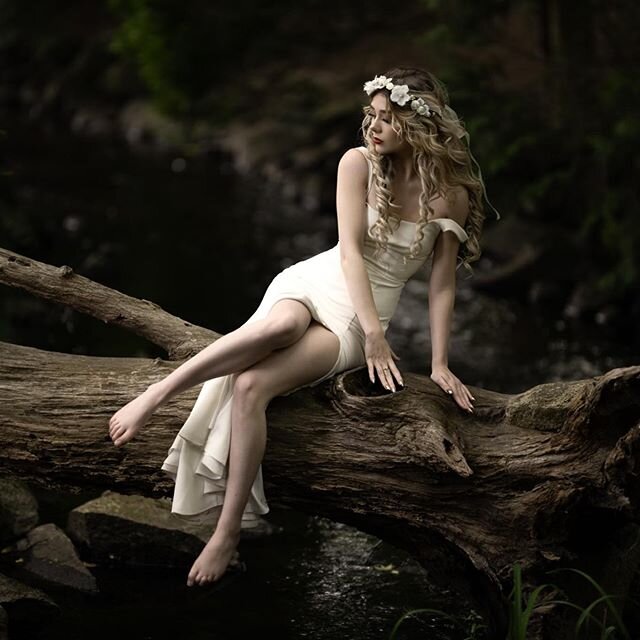
During the summer, in Vancouver the sunset is 8-9 pm. We were shooting at 3 pm in the afternoon so the sun is still pretty high. There was barely any cloud on the sky, the light is very harsh. The shoot location is not very super easy to get to. We had to cross over a muddy area by hopping over logs so we can get to the sandy beach. Carrying a light stand kind of helped me to balance but still I’m not gotta carry any extra gear. I only got one lens. I was thinking taking the Zeiss Contax Planar which is a lot smaller and lighter than Sigma 50 art, but it’s manual focusing. Manual focusing is not an issue for me when shooting mirrorless. Check out this blog about using manual focusing lenses. But I know I’ll be running into some situations that I need to tilt the light with one hand and shoot with the other. You’ll see this on the behind the scene video. When doing that auto focusing just makes a lot more sense.
For the lighting setup, I used Profoto B2 (250ws) with a silver beauty dish and a small softbox (1.3x1.3’). You can get the same effect with something a bit bigger or smaller. The size is not the most important part, it’s the position and the lighting position needs to be changed when the any of these changes, the angle of the sun; the shooting angle; where your subject is facing. Pay detail attention on the lighting position if you purchased the BTS video, everything is showing there. Don’t just look at what gear I used, what’s more important is where I put them. It’s pretty easy to figure out that your light is too bright or too dark, but not that easy to figure out where should be the best position of our light based on the shooting condition. So again, pay attention to the lighting position on the BTS. Everything is there. You do the same, you’ll get the same look. After you finish your light testing, every single shots should look great. The high light, mid tone, and shadow are in the right balance. The form is well defined. The 3D look people talking about.
Still we are not done yet.
Once you get the lighting setup properly, how many shots you should take? I guess everyone has different ideas. Some one take a couple and some one take a lot more. I choose the latter. Why? I believe photography is not just about lighting, if you think you did a great job with just good lighting and great editing, then you are still too technical and not artistic enough. The mood is an important component that we can’t afford to overlook. The model’s express and posing will have great impact on that part. We need to work on exposure, lighting, composition and editing, we also need work with our model. A subtle change on the expression and slightly change on the angle of face might make a huge difference. Do some fine tuning and keep shooting while you are doing it. You can always delete the photos you didn’t pick (I delete a lot) but what can you do if you missed the moment? Remember when you are out there shooting, you are not a photographer, you are director. You’ll know what I mean when the model, make up artist, designer and every one else in the photo shoot all look at you and goes “now what”.
That’s it. Check out the other blog posts on my blog page. Subscribe so you won’t miss any new blog posts about lighting, editing, composition, bts and anything related to portrait photography. You will also receive a bonus which contains high quality lighting diagrams of some of my most favourite shots.

Find this one useful? You might also want to read this article.
Want to learn more? I host one on one workshop online
Another blog talking about choosing the background when working on location